My twenties were a period of time where I wandered from one low paying job to another, while I was trying to make a living as a freelance photographer. I did a lot of warehouse work in those days, and various Manpower temp jobs. In the process I think I’ve put up more generic utility steel shelving in my life then Carter has pills (as my mom used to say). I’ve put up a fair amount of wood shelving too, including the Ikea particle board and veneer bookshelves scattered all over Casa del Garrett. Which is all to say that, dazed and confused though I am about a lot of things, I pretty much know how to put together shelving.
Casa del Garrett is full of shelving. There are bookcases everywhere, both free standing and bolted onto the walls. I’ve added the occasional shelf to the kitchen cabinets where I thought they were needed. There’s wall shelving in the basement, where I keep my winter supplies, and little glass shelves where I keep my favorite bottles of sugary cordials by the bar that I’ve modified slightly to suit myself. This afternoon, I attempted to put up some new steel shelving in the basement, in a corner that I’ve needed to organize for some time now. I say ‘attempted’, because I ended up buying what must be the worst piece of junk I’ve ever seen in my entire life. Which kinda impresses me in a way, because as a fifty-four year old American, I’ve seen a lot of junk.
The corner in my basement where the dryer and the sump pump live is an odd one. I’ve been fussing with it ever since I bought the house, never quite knowing what to do with it. Eventually it began to accumulate a bunch of other things I didn’t know quite what do with either, mostly tools. In one spot I kept all my tall yard tools…various rakes, shovels, and such, and the wide utility bristle broom. These were all kinda piled together in the corner and getting one particular one out of the pile was getting to be a chore. Next to that was a spot where I’d been stacking up power tools in their plastic carry cases. Some of them, like the grinder, didn’t have nice carry cases so I left them in the boxes they came in. On top of the grinder box I had two rubbermaid storage bins full of various things. One bin holds all my extension cords. Another some darkroom equipment that I seldom use anymore, mostly relating to the enlarger I don’t have anymore. Next to that, was the big box my leaf vacuum lives in between seasons. I had the miter saw stacked on top of it.
So that was an area of the basement that needed organizing. What kept me from doing it was that all the dimensions there were odd. Most ready made shelving comes in 36 or 48 inch widths and I had only one chunk of space of 30 inches and one of 22 to work with. Additionally, the circuit breaker box and electricity meter is near the middle the wall and the water pipes and shutoff valves to the bathroom on the other end toward the bathroom. I couldn’t build shelving over either of these, and I couldn’t put anything over the spot in the floor where the sump pump was. Every time I stopped to think of ways to organize that space, I’d get bogged down trying to resolve all the odd dimensions I had to work with, and I’d just put it off some more because there was always something else to do around the house. I could have easily built some custom wooden shelving, but I didn’t want wood next to the dryer, which is gas.
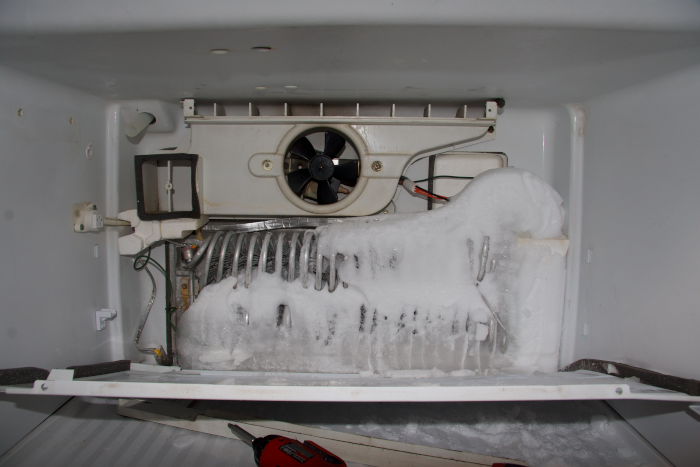
What finally got me motivated was sometime during that night last Thursday the bathroom toilet sprung a small leak where the water feed connects to the tank. A small trail of water then spread from the leak out the bathroom door and toward the sump pump. Which is good…that’s where leaking water is supposed to go in the basement. But along the way it seeped into the cardboard boxes where my leaf vacuum and grinder live, which made the bottoms soggy enough that they collapsed under the weight of the bins and the miter saw stacked on top. I came downstairs yesterday morning to get some things out of the dryer, only to see the miter saw and the Rubbermaid bins tumbled onto the floor, the leaf vacuum box on its side, the grinder’s box sagging to one side, and water seeping out from the bathroom door.
Good morning sleepyhead! So the first thing on the agenda was finding out where the leak was coming from, and then turning off the water to the bathroom. It’s…disturbing…how much water can result from just a small drip drip dripping leak over just a few hours. The previous owner had installed these really nice ball valves on the lines leading into the bathroom in the basement, so shutting off the water to the bathroom wasn’t a problem…I didn’t even bother with the toilet shut off valve. Those ball valves are nice…at some point I want to replace all the shutoff valves in the house with them. Once the water was off I moved everything out of the area and mopped it all down. I spent a few minute checking the miter saw and the grinder for damage. They looked okay.
I put a bucket under the toilet tank by the water feed and flushed once to empty the tank, then disconnected the water feed and removed the old fill valve and let the remaining water drain out. I checked the area around the inlet to make sure the tank hadn’t cracked on me, which thankfully it hadn’t. Then I took a quick trip to Home Depot for a new fill valve, and a flexible water line to replace the solid one the previous owner had installed between the toilet shutoff valve and the tank. The only flexible water lines in Casa del Garrett are the ones I’ve installed since moving in, and that’s basically the second floor toilet. Eventually I want to replace every final connection to every faucet with flex line too because it makes things easier to work on.
While I was at Home Depot I wandered around the shelving area. Now I really wanted to get that corner around the dryer and sump pump under control. Over the years I’d let it become a clutter that I had to wade through whenever I needed something. Just getting out the big broom usually meant taking several other long yard tools out of the stack first, just to get to it. While I was looking around Home Depot I saw just the thing: a really neat looking yard tool organizer made by Black and Decker, that looked like it would fit in that area nicely. It was only twenty bucks.
Then I spied some shelving that was just the right size: Thirty inches wide and not 36. So I brought a box of that home too. It’s this shelving I want to warn you about.
As I said at the beginning of this, I’ve built a lot of steel shelving in my life. This stuff, made by Edsal, is just plain junk. When I got the box back home and opened it I saw a collection of cheap steel stampings that, when you fitted them together, simply would not stay together.
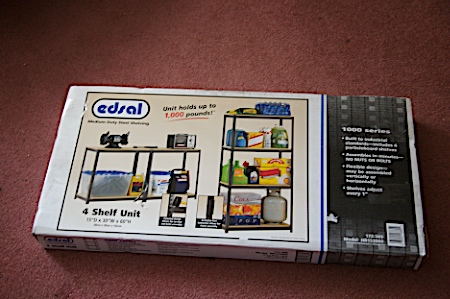
Note that the propaganda on the box says the "Unit holds up to 1,000 pounds!" Sure sounds like they’re telling you this thing can hold a lot of weight. And here’s what’s supposed to hold all that weight:
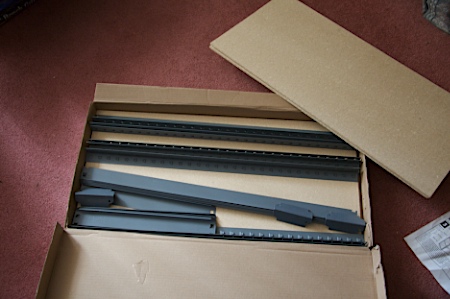
That’s it. That’s what you get. A bunch of cheap steel stampings and four 1/8th inch pieces of particle board. There are little tabs on the uprights, and groves on the cross members you’re supposed to fit together and, as the instructions say, lightly tap into place until they lock.
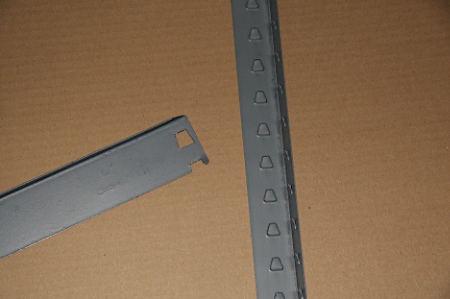
Except they don’t lock together at all. The cross members kinda loosely hang over the tabs…
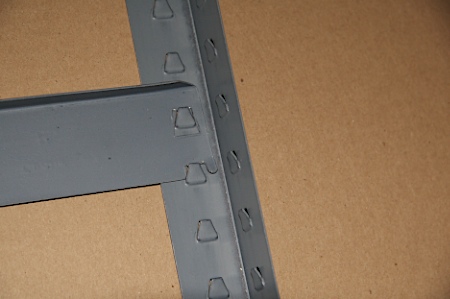
I tried for hours to get the pieces of that thing to stay together long enough that I could fully assemble one section (you’re supposed to bolt two sections of this thing together (!), one on top of the other, to get the advertised height) and they just wouldn’t. Look closely at that joint. There are two fatal flaws in the design that I can see. First, the groves on the cross beams don’t seat all the way down on the tabs. At least, not with the "tap" that the instruction manual says you give them. In fact, you can take a hammer to this joint pretty forcefully and the cross beam still won’t seat fully. But look more closely. Notice that the end of the cross beam doesn’t fit right up into the corner of that upright. There’s a small gap there, between the end of the beam and the corner of the upright. That allows the beam to move slightly along that axis, even after it’s seated as far as you can get it to seat in the tabs. If it sat snugly in the corner it might not be so bad, because it couldn’t move then. But I still wouldn’t want to load this thing with a thousand pounds of anything.
Some steel shelving uses x bracing you attach to the back of the shelves to add rigidity. As near as I can tell, Edsal expects the particle board shelves you lay over the beams to provide enough rigidity to the unit that the beams won’t wiggle out of their tabs. But they don’t. The entire unit can still flex and twist enough that sooner or later one of the beams wiggles free and then the entire thing collapses.
I never got it put together. After a while I started trying to out think the poor design of the thing, and that led me to determine that I’d have to drill holes in it so I could bolt the damn thing together, and then add some additional bracing in the back of it or else I could never trust it to hold anything. I was seriously considering doing that, but I eventually realized I was letting my pride get the better of me. I didn’t want to admit I’d just been taken for a sucker. I’m not normally that trusting of what I see on the box. But I never expected in my wildest dreams to open a box of basic utility room steel shelving that was this utterly pathetic.
For kicks and grins, I did a google search on Edsal steel shelving, and came across these customer reviews over at Amazon of the 36 inch wide model…
Awful
Complete junk – The other 3 reviews describe the issues perfectly. I had to use duct tape to hold the pieces together.
…
Junk!
This product has got to be one of the most poorly designed that I have ever tried to assemble. While boltless design may sound appealing, the slide-in tabs are not built to fit the piece that must be locked into it. Therefore, one is required to wedge, bang, or pry open the tabs so that they may be large enough, but once you get the pieces to fit together, the opening is far too large for it to stay secure. So then you try to bang it closed. Very sketchy. The whole piece wobbles, falls apart at random moments throughout the assembly process, and the cardboard shelves are flimsy, full of splinters, and cheap. The whole experience was frustrating, right down to trying to fit all the pieces back into the box so that I can return it.
…..
Worst EVER
These shelves won’t even support their own weight. I’d hate to see what might happens if a person actually tried to store something on them. I have fairly extensive experience with this type of inexpensive metal utility shelving and these are BY FAR the worst Ive ever tried. No matter how well you seat the boltless "fasteners", the unit sways and twists uncontrollably. A close reading of the instructions reveals that the shelves must be attached to the wall to work (this despite the clear picture of a free-standing unit on the box). Additionally, the 1/4 inch(!) particleboard shelves are weak like cardboard (but heavier), and do nothing to support the structure of the frame. The last straw is the complete lack of a crossbrace which might work to keep the thing square. What a total waste of time and energy. On the plus side, disassembly is a breeze since it falls apart on its own. :D
…
Four big NO votes on American Inventor..!
"Close, but no cigar" describes this attempt at a "boltless" shelving unit. It’s nice not to have to worry that there’ll be enough nuts, bolts and washers in some plastic baggie, but the reality of it is an extremely frustrating experience.
The tabs are poorly designed- both tabs on an end of the horizontal supports are exactly the same length. This means that BOTH tabs have to be started perfectly AT THE SAME TIME, to make them slide in. If one tab was slightly shorter, you could start one, then the other.
If the tabs are bent AT ALL, they won’t line up properly and either won’t slide into the slots, or will poke out to the outside instead of properly sliding all the way through the slot. Either way, it means taking the joint apart and bending the tabs until they slide in.
The problem with that is that there is NO positive locking of the tabs once they finally DO get through the slots. This means the end you struggled with for 10 minutes may pop out while you’re trying to deal with the other end. Trying to remove one end to re-align the tabs is likely to disloge BOTH ends, making you start completely over. The weight of the shelves and the items on the shelves will hold the tabs and slots together once you get that far, but during assembly it’s a recipe for extreme frustration.
There’s more wrong with the desigh, but you get the idea… I never wished so much for a plastic baggie full of nuts and bolts.
So I’m not the only one who is a tad displeased with the product. This crap should have never made it out of the drawing room. Somebody in management should have laughed in the face of the "engineer" who brought them this thing. You’re joking…right? Hahahaha…good one… Now get back to work…
I’m taking the shelves back to Home Depot in a little while. I’ll let you know what happens there. Basically, I’ll settle for a store credit. But I’m going to strongly urge them to get word back up the chain of command there, that this stuff is dangerous. Somebody manages to actually get this shelving together and actually tries to load it up with a thousand pounds and they’re going to get hurt.
[Update…] Home Depot cheerfully accepted my return, no hassle…
Me: Hi…I bought this here yesterday…
She: Yeah…I think I sold it to you.
Me: Right…yeah…you were working the register…
She: (cheerfully) So what’s the problem hon…?
You gotta love Baltimore folks. I explained the issues I had with the shelving and she took the merchandise back, scanned in my receipt and issued me a credit. So that’s that. Hopefully word percolates up the ranks that this stuff isn’t worth selling. Somebody gets hurt when one of these collapses under weight and you just know the lawsuits will go flying…